Although this guide was written in 2018, no subsequent releases of GarageBand have included the ability to change time signatures midway through a project. MuseScore has been updated to version 4 but the procedure remains substantially the same.
Introduction
While most music compositions and arrangements you’re likely to work on will be written in just one time signature, you may well find yourself needing to handle two or more time signatures in the same piece of music.
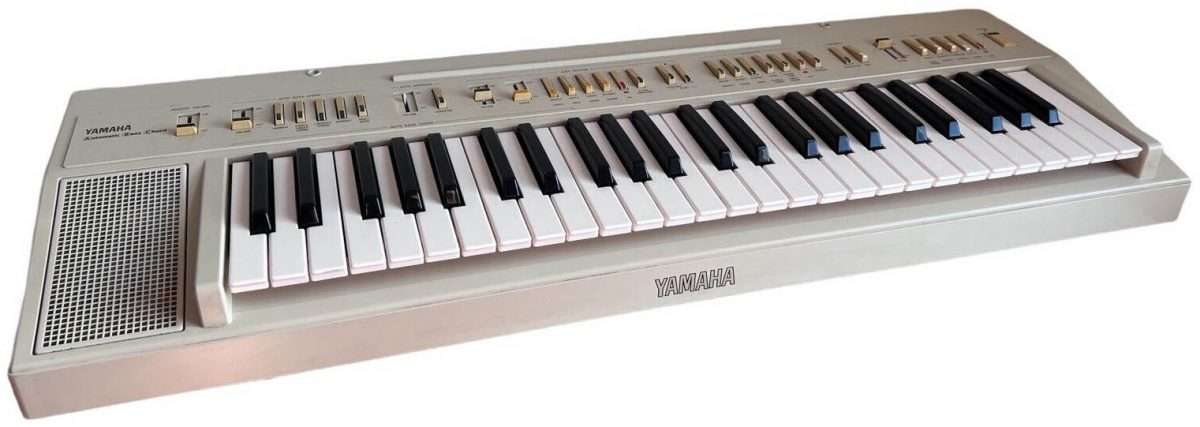
It’s generally accepted that GarageBand, Apple’s free music creation software for the Mac, cannot do this for you.
GarageBand 10 will happily handle tempo and key transposition changes, as well as a host of other automation, but time signatures are not its bag.
The “Ignore It” Solution
One solution to this issue is to ignore the written time signature completely and simply compose and construct your music with the tempos and keys you require, keeping a mental note (and perhaps through naming and note taking) of where time signatures need to change.
A couple of issues immediately spring to mind with this approach:
1. Some Apple loops are designed to only work with particular time signatures – that is a 4/4 loop won’t work in 3/4. This isn’t a big problem if you don’t plan to use loops, or can otherwise work around it by only using loops for one time signature.
2. If you plan on using the musical notation feature to view your music, you may well run into problems as many of the bar/measure lines and note values will be out of place.
The MIDI Solution
While there is not (yet) any way to directly change the time signature part way through a song, there is a workaround which uses MIDI files.
For this, you will need some software which is:
- capable of creating a musical structure with various time signature changes in it
- able to export standard MIDI files
Because I do a lot of score editing in its own right, I use the excellent (and free) MuseScore 3. Not only can it produce top-grade printed music, but it’ll output straight to MIDI.
I’ll be using it for the first part of the tutorial, as it’s what I’m used to. If you use another software package, you’ll need to find out how to export the required MIDI file in your own format, and then skip to the GarageBand instructions further down.
Here we go.
In MuseScore:
Please note that these instructions were created with MuseScore 2. The procedure for creating this file in subsequent versions may alter slightly but is generally the same.
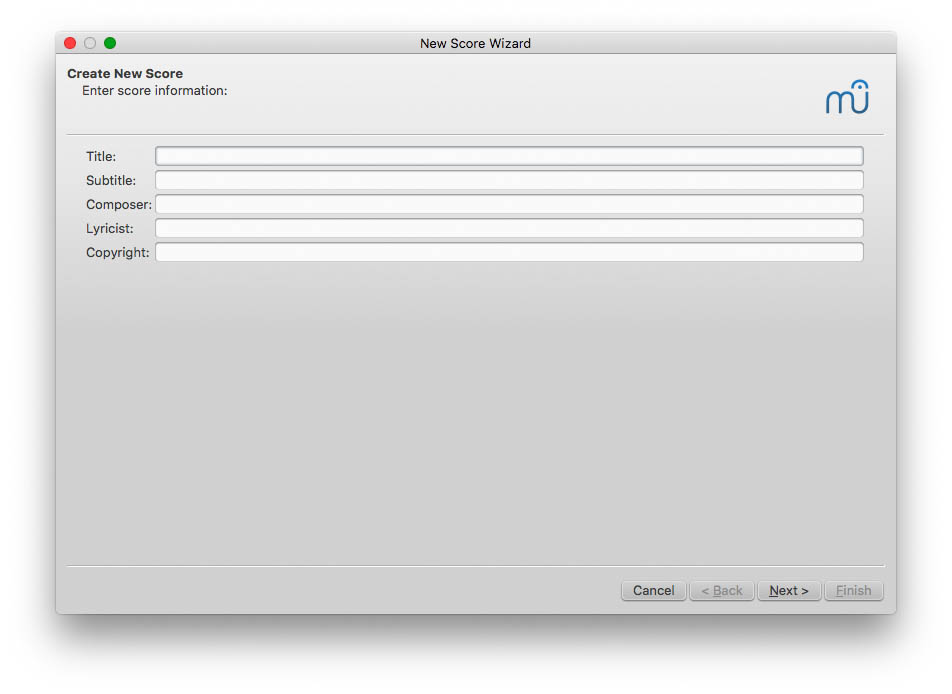
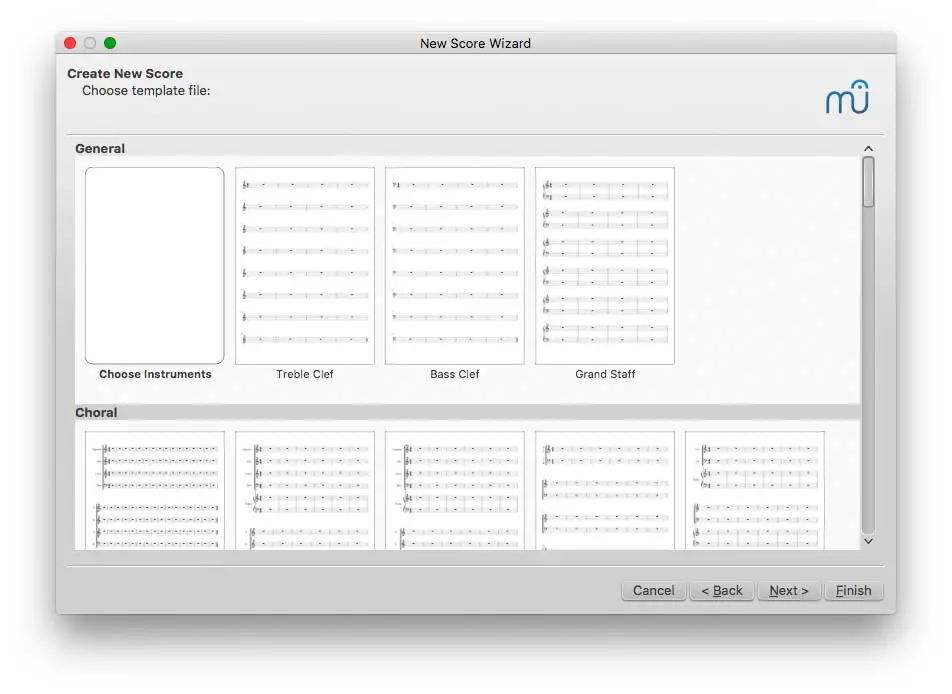
1. Create a blank manuscript (Apple-N). You can skip the score information on the first screen so click “Next”.
2. Create a treble clef document – it’s all that’s needed.
3. If you want to put in the initial key and tempo you can do so, but as GarageBand can change those, it may not be worth it. Either click one or click “Next”.
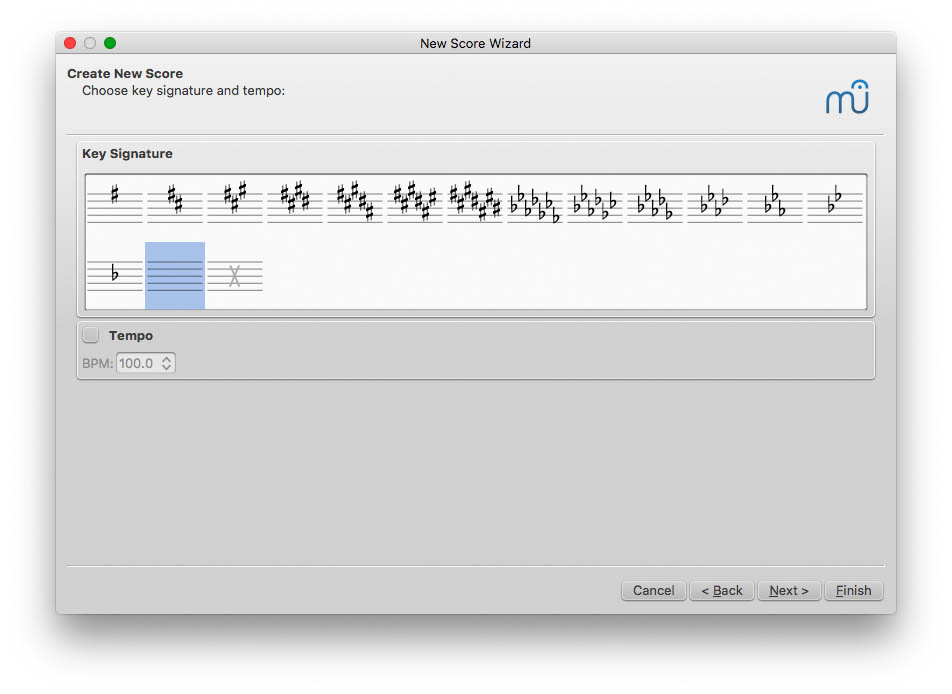
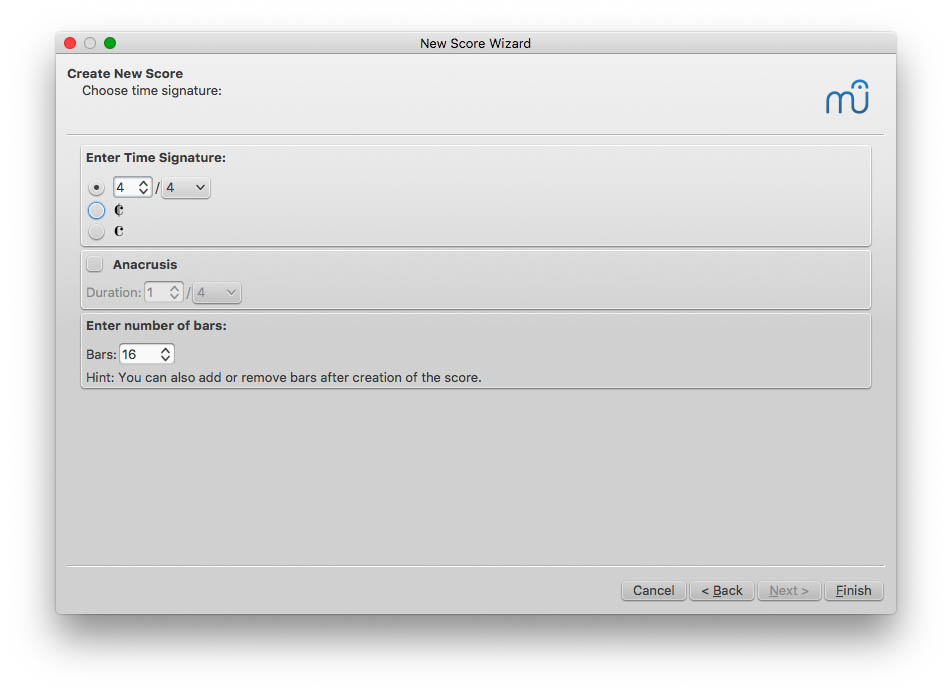
4. Enter the main time signature of your piece. I’d recommend using whatever the majority of your musical score is composed it.
In MuseScore, the top number can be anything from 1-63 and the bottom (note value) number 1, 2, 4, 8, 16, 32 or 64.
Enter the number of bars (measures) your piece has. Although you don’t have to create every bar in MuseScore, you at least need enough bars to accommodate all the time signature changes.
Click “Finish”
5. Here’s the manuscript you’ve created.
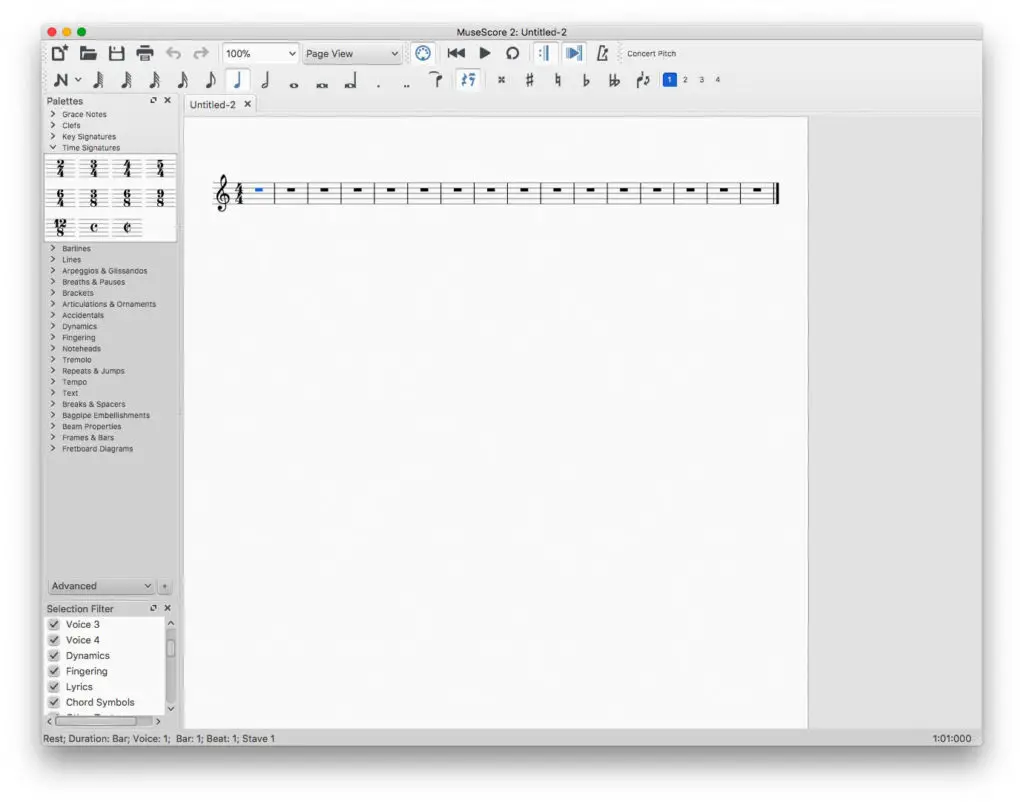
On the left-hand side of the window, you’ll see some Palettes. (If you don’t, make them visible from the “View” menu.)
Click open the Time Signatures palette.
Click the bar where you want the time signature to change, and then double-click the required time signature. Alternatively, drag and drop the required time signature to the required measure.
(Here I’ve got a 4/4 piece of music with 3/4 from bars 4 to 7 and 6/4 from bars 5 to 11).
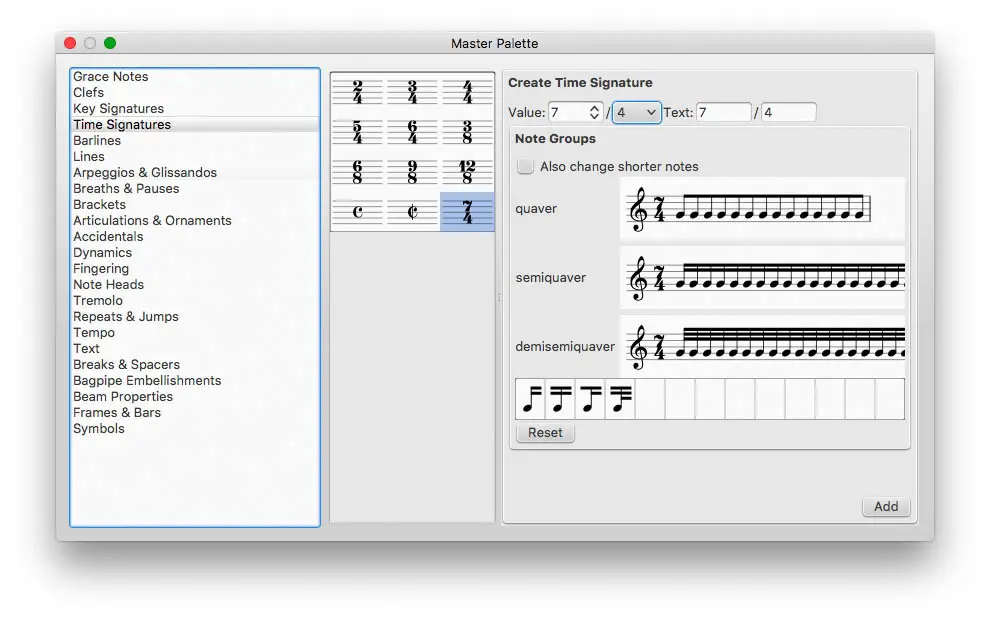
If the time signature you want isn’t in the palette, you can create it from the master palette. Press Shift-T, click on Time Signatures, then add the time signature you require. Here I’m adding 7/4. Click on “Add”.
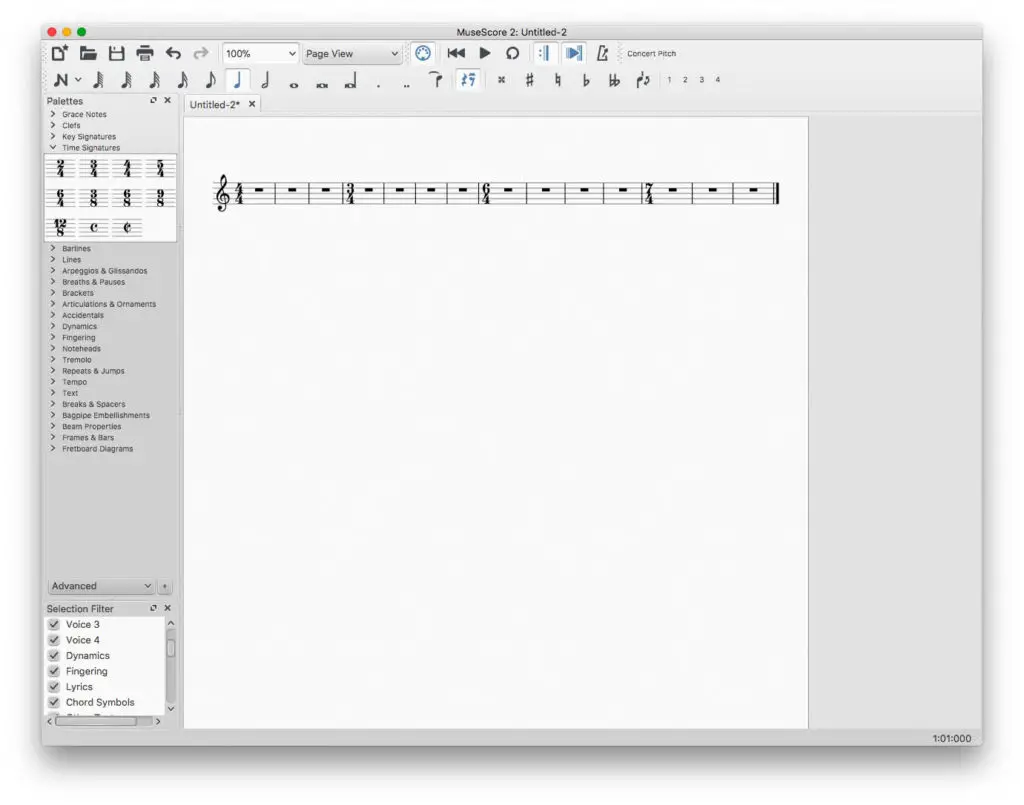
Now drag-and-drop this new time signature to where you want it. I’ve added 7/4 to bars 12-14.
Keep doing this until you have the structure required. Don’t forget to change back to the original time signature (if needed).
You don’t need to add any notes – just the bar structure is adequate.
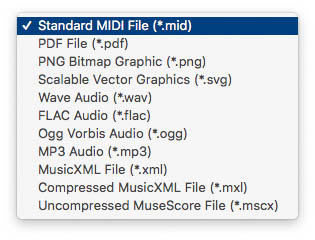
6. Click “File” and “Export” and then select “Standard MIDI File (*.mid)” from the drop-down file type menu. Give the file a name.
In GarageBand
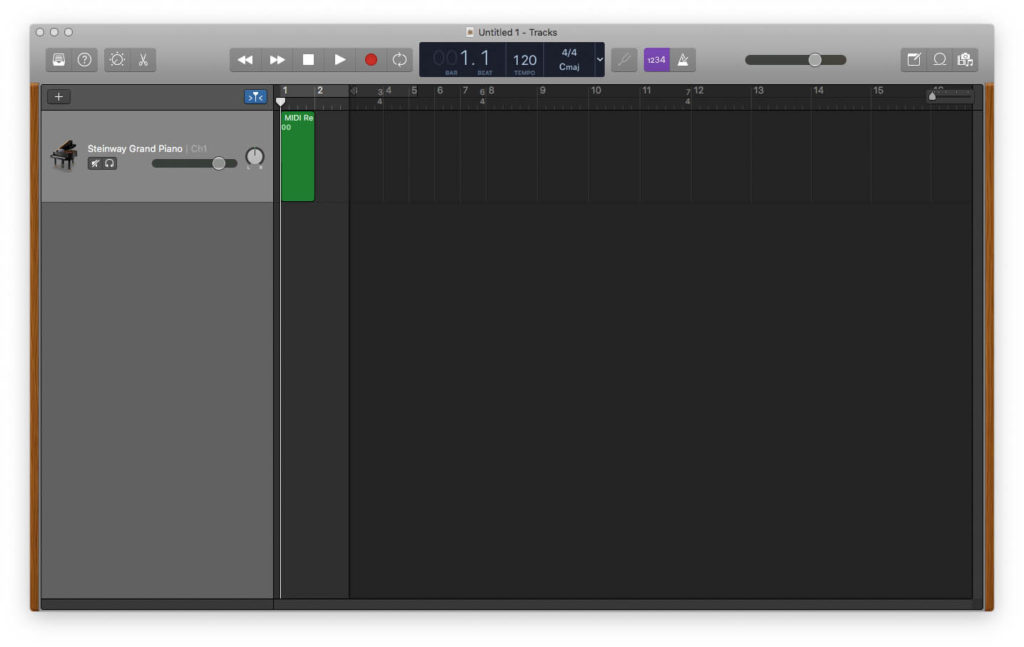
7. Find the file, right click and select “Open with GarageBand”. (If this option isn’t available, you can open it directly in GarageBand from the file menu).
8. Your MIDI file should open in GarageBand. Look at the top timeline and you will see the time signatures and varying beat divisions exactly as created in the MIDI file.

You can now go ahead and create your music.
The only caveat is that (as far as I know) you can’t move time signatures around. You also can’t insert or delete blocks of time. So if you change your mind on the structure later, you’ll have to go back to your MIDI file creation software and redo the basic structure.
That said, if you already have a good idea of the structure of your song, this is a way of getting GarageBand to do what you want.
Was this helpful to you? We’d really like to know if this tutorial has helped you out in any way.